If I have confessed it once, I’ve confessed it a million times: I take more photos of my sons with my phone then I do my “fancy camera.” I think any professional photographer would admit the same. It’s always on my phone! However, I have been extremely “underwhelmed” with the quality of my cell phone photos. They are too dark and just plain bad sometimes. To get them to a point in which I wasn’t embarrassed to post them, I would quickly edit them in Lightroom mobile. I found myself doing the same edits over and over. So, I made what is called a “preset.” After reading this post, you will learn how to install and use mobile presets with my free preset.
What’s a preset, you ask?
Think of it like a filter, one click and the photo is instantly edited and looks way better! Don’t worry- they are so easy to use. However, installing them can be a little tricky. The good news is you do it one time and you never have to do it again. Even if you get a new phone, simply download the Lightroom app, log-in, and you’re preset will be there waiting for you. Keep reading to learn how to use install and use a mobile presets step-by-step (with a FREE preset!) More of a visual learner? Check this video for instructions!
Step-by-step on how to install a mobile presets:
-
First, download the Lightroom app. Adobe Lightroom Mobile (Free)
-
Second, download the preset you purchased.
You can download one of my preset here for FREE! Click here!
- Now, click Download Now.
- A box should appear. Tap “download.”
- You will see an arrow appear at the top right with a status bar under it. Then, touch it. Once it’s downloaded, tap the file.
- A zip file should appear.Tap “A Summer Day | Kayla Brint” to unzip it and the file will appear. (Also, if you ordered a collection with many presets, you will have to unzip the file by simply touching the zip file but instead of one file, a folder will appear. Tap the folder and you will see each of the presets in the folder. You will then download them one at a time with the following steps.)
- Tap that file. You should see a screen with the title “A Summer Day | Kayla Brint” (or the title of the preset you purchased)
-
Next, WRITE DOWN THE NAME
of the preset, you are downloading (or remember it.) In the case of my free preset, it’s A Summer Day.
- After that, tap the box with the arrow pointing up in the bottom right.
- After apps come up at the bottom, scroll to the right until you find the Lightroom app. If you don’t find it, you can touch “more” to find the Lightroom app.
-
A box will pop up and select “Launch Lightroom Now”
- One of my images will be in your Lightroom album. Tap it.
- After the image is in view, click the circle with 3 dots at the top right. (…)
- Next, choose “Create Preset.”
- Remember the name I had you write down? Type it here. That’s the name of the preset.
- You did it! That preset/filter is installed.
Using the preset is super easy! Simply open your image in the Lightroom app. Find “preset” at the bottom and touch it. The presets you have downloaded should all be there. Touch them to edit the image with just one click!
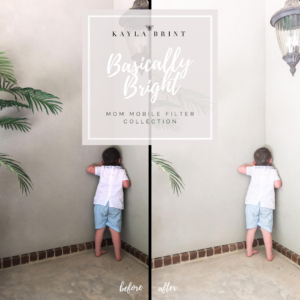
Now you know exactly how to install and download a preset! I hope you enjoy the free preset. If you are interested in the full collection, check out The Basically Bright Collection in my shop. I seriously use these almost every single day… from the baseball field to my son losing his first tooth- Mom Moblie Filters make my iPhone images look great!
If you download the free filter, A Summer Day, or purchase the collection, don’t forget to post them and tag me @kaylabrint so that I can see and share them! One more thing to make motherhood a little simpler and a lot more beautiful! Enjoy, friend.


VIEW THE COMMENTS
add a comment